Sunday, October 3, 2010
Have you heard of Zentangles?
These are my first zentangles. I think these are so cool! I heard about these maybe a year ago, but didn't investigate them at the time. This weekend I was checking out another paper crafter's blog, and she had just tried zentangles herself. She linked a website that had a video showing you how to create one particular pattern. I watched the video, tried out the pattern they were describing, and I was kind of hooked. I zentangled until late into the night. And I did more the next day. And the next. Very fun, and addictive. I like the way they look - just simple black and white art. I will see if I can incorporate them into cards.
I'll try to describe zentangles here, but you should go to http://www.zentangles.com/ for more info. They are little pieces of artwork made up of doodles. I don't think they're supposed to be called "structured" doodles, but there can be some structure to them. You draw repetitive patterns within a defined space. You use white paper and a Sakura Micron 01 black pen. (I tried it with a black gelly roll pen, and that was too gloppy.) If you really want to know more about them, check out the zentangles website. You can get an overview, you can see lots of samples, you can see some easy to follow instructions on how to create various "named" patterns. Give it a try!
Mini-scrapbook - My Cats
Here is the mini-scrapbook I made several years ago, which gives you an idea of what the ones below will look like when photos are added to them. This is a great little project to make for yourself or give as a gift.
Mini-scrapbook - The Cat's Meow
This is a cat-themed mini-scrapbook I made last week. It's a 4x4 book. The top photo shows the cover, which was really cute. Unfortunately, I didn't realize my photo had that flash glare in it until I downloaded it to the computer several days later, by which time the book had already left my house. So, the glare wiped out the cute kitty face. (You can see the cover in the middle photo, on the right-most page. This was put together primarily with paper and stickers from a Die Cuts With A View 8x8 cat-themed paper pad. I added a few rubber stamped images as well. Just add photos to the solid-colored photo mats, and you have an adorable mini-scrapbook about your favorite cat(s.)
Mini-scrapbooks
Mini-scrapbooks --- I have one that I bought as a kit several years ago. A scrapbook store, which is no longer in business, was selling themed kits of 4x6 mini-scrapbooks and I just loved them. I put together the cat one and filled it with pictures of cats I've owned, and other cats I've known over the years. It is just adorable, and I have it displayed in my living room where I see it every day. It is a very simple construction; it has two chipboard covers for front and back, and then cardstock pages that accordion fold, and they are simply glued to the front and back covers. This gives you a book which is double sided. Every so often I turn my cat book to the opposite side, so I give all my cats equal face time. The only thing I originally disliked about it is that the photo mats end up being 3" x 3", so you have to really cut down your photos, or shrink them in a computer program and print them out smaller. But the whole thing is so cute that when it's all put together you don't mind the smaller photo size. I'll post photos of my own cat book in a little bit.
So, this Halloween book is a 4x6 book. I decorated the pages with paper that I used in my Halloween card making, and various rubber stamps that I own (Studio G $1 stamps, SU.) The cover stamp is a Tim Holtz ATC stamp. I sponged the background colors on lightly after stamping the image in black. The tag below it which says "Halloween" I stamped on white paper and sponged ink over it. Then I covered it (rather liberally) with Ranger's Glossy Accents and let it dry for a day. When I went back to work with it the next day it had left a rather pliable piece of embellishment. On the backside, the paper was soft like cotton. The front was glossy and the whole piece was bendable without cracking. I then punched the corners with my SU ticket punch and glued it onto the book cover. The middle photo shows how the book looks when you open it up, and the bottom photo shows the back side. You can add photos of your favorite ghosts and goblins on each solid cardstock square, and display it in your home or on your desk at work.
It's Time for Halloween!
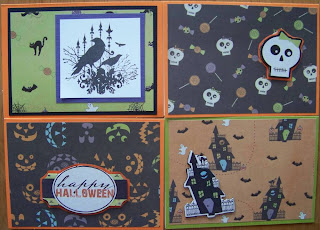
I've been having fun making Halloween cards. I always find it weird that I love to make the cards, collect Halloween stamps, enjoy the purple/green/orange/black combinations in the Halloween papers, but I never send Halloween cards out to anyone. I keep telling myself, "Just mail them to anyone!" But I don't. Anyway, these are just some simple cards using two different booklets of patterned paper, some solid cardstock and ribbons from my stash, and some of the $1 stamps from Studio G.
Subscribe to:
Comments (Atom)


